
Getting a seat through college counselling is a big achievement. But the journey doesn’t end there. Many students are unsure about the steps to take after receiving their seat allotment. Don’t worry—this guide will help you to understand the exact steps to follow after you receive your seat allotment.
1. Check Your Allotment Result Carefully
Once the seat allotment results are declared, log in to the official counselling website and download your allotment letter. This document confirms your allotted college and course. Read the official guidelines for counselling to understand deadlines and procedures.
Look for:
- Name of the allotted college and course
- Reporting date and time
- Payment details (if applicable)
- Instructions for the next steps
2. Decide Whether to Accept or Upgrade
Counselling systems often give you a choice:
- Accept/Freeze – You’re happy with the allotted seat and wish to finalise your admission.
- Float – You accept the seat but want to try for a better option in the next round.
- Slide – You want to stay in the same college but try for a better course.
- Choose the option that best suits your goal, but be mindful of the deadlines.
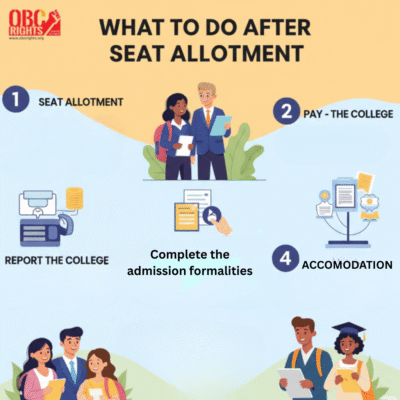
3. Report to the Allotted College or Counselling Centre
After confirming the seat, you need to report to the college or a designated reporting centre, depending on the counselling authority.
Reporting can be:
Online – Upload scanned documents on the portal.
Offline – Visit the college or the Admission center with original documents.
Always check the official instructions for what kind of reporting is required.
4. Pay the Admission Fees
Most colleges require an initial payment to secure your seat. Visit the official college website or admission portal to pay online or check offline payment options. Keep the payment receipt safe for future reference.
5. Verify Documents at the College
After payment, visit the college for document verification. Officials may check originals and take copies for their records. Prepare both original documents and photocopies before reporting. Commonly required documents include:
- Seat allotment letter
- 10th and 12th mark sheets and certificates
- ID proof (like Aadhaar card)
- Passport-size photos
- Community certificate (if applicable)
- Income certificate (for scholarships)
- Domicile or residence certificate
- Transfer certificate
- Counselling registration and fee payment receipts
Photocopies or scanned copies will not be accepted as valid proof. Failing to provide the original documents may result in the cancellation of the allotted seat.
6. Apply for Accommodation & Scholarships (If Needed)
Hostel applications open after admission confirmation—apply early to secure a place. Also, explore scholarship opportunities to reduce financial burden.
Final Words
Getting a seat allotted brings you closer to your dream college, but acting on time and having the right documents are essential to consolidate it. Follow each step carefully, stay updated through the official website, and don’t hesitate to ask for help if you’re unsure.
Good luck with your college life – it’s going to be a great adventure!